Tuesday, December 8, 2015

YouTube Videos Analytics

Have you ever uploaded a video on YouTube and wanna know its statistics? YouTube has its own statistic program inside your Google Account. You don't need to connect it to Google Analytics account if you don' want, but of course GA would do a better job tracking down users. 

Okay, so in order to upload a video, you must create an account, which will be your "Creator's Studio" for YouTube videos. Once you have done that, visit YouTube and you will notice this on the top right corner.


The little circle is to direct you to your YouTube profile and your current videos. Once you are there, you will see your Creator's Studio panel on your left. Click on Analytics


Just like GA, it also has the Real-Time feature that allows you to see the activity live. It also has a section for demographics that will track down gender, age, and other characteristics of it. Your analytics over view will look something like this.


Because I don't have any videos uploaded, you can see that everything in at zero. No movement.
Something that would be cool to do, would be to post a video on your Weebly site and set that as an event on Google Analytics account. Therefore, you upload a video to your YouTube account, you post it on your Weebly site, and you track it down as an event on your GA account. The YouTube analytics will tell you how many views and demographics your video has while the event will allow you to see how many people viewed the video from your website. You see, you can identify the engagement of your users from many sources. The point is, your source is more accurate. And it is pretty fun too.


Using Real-Time in Google Analytics.

Real-Time is a feature of GA that allows you to view a certain website's traffic live. Each movement done by users can be tracked and analyze in the same moments as it happens. One of the things I enjoy of it is tracking down the Events in Real-Time. An event can be a certain video you want your users to watch. It shows you how many people are watching it right now, and the statistics of how many events you are reaching per minute or per second.

For big companies, specially in the music industry, they wanna know how often is that music video being played in a certain YouTube channel, what times a day, and how many times by the same user. This helps you define the success of the video on your target audience a little bit better.

Another feature that I enjoy is the 'Conversion'. Exactly the same job as 'Event', helps you track how many conversions you are getting per minute or second. For business websites that sell products, lets take Amazon for example, they will track how well their AmazonProducts will sell this holiday. Specially on the past few weeks from Black Friday, with conversions, the tracked how many times was one of their products bought by time. This can help them know their target a little bit better and in the future make new promotion strategies depending on time of the day, gender of customer, age, etc.


Custom URL for LinkedIn.


LinkedIn has become the top social media for job hunters. It doesnt only help get jobs, but also be found by companies for potential and unlimited job opportunities. It gives a more complete view of a person both as a professional and as a human being. That is why many job hunters today add their LinkedIn to their information segment of their Resume. Today I will show you a few quick steps to customize your LinkedIn profile URL, so it fits perfectly on your Resume.

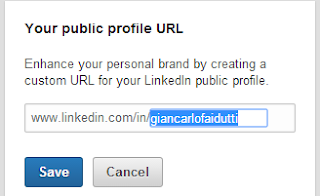
Head to your profile and click on 'Edit your Profile'. You will see beneath your profile picture that there is a link. Click on the settings icon that will appear next to it by moving your mouse on it.


On your right you will see a small box that looks like this.


Click on the pencil icon and, what you can do is basically choose how to show your name after the '.com/in/'
As you can see there, the shaded area is the available area for customization. Choose to shorten your name or the other way around. Make it as big as your resume needs it. AND THAT IS IT!


Taking the Google Analytics Test!

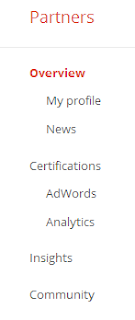
Google Analytics is not something that you can learn to use from night a day. It takes a few days to get a hang of it, understand it, and finally master it. I am no master in GA, but I can help you study to take the test so you can get certified sooner. First, create a Google Partners account. After you have done it, your home page will have a panel to the left with some options. 


Click on Analytics. Then, you will see on your right the option to take the exam with the instructions of it. It's a 90 minute limit test of 70 questions, which you pass it by getting an 80%. That means that you have a 15 question margen of error. Anyways, I have a few links that will help you study. Check them all out before taking them. Study AS MANY hours you may need before taking the test.


GOOD LUCK!!

Monday, December 7, 2015

My Thoughts on Google Analytic.


For the past 3 months that I have been learning about GA, besides the first impressions and struggles to understand what the hell its talking about, I came to have a very unique appreciation for everything I learned about it. Despite the hard times I went through studying from the most basic things to the top hardest ones, I feel like I have achived something that can help me or other people in the future.

At the beginning of the semester, my professor told me that "Google Analytics is like using magic for modern businesses"; I didn't see it first but now I think I understand it. You can see what nobody else can't. Example: A woman who's online site isn't selling as much as she wanted to, doesn't know what she is doing wrong. This could make her think that her product is not good and probably quit. But with GA you can find the sources of the problem, and see that she had a poor landing page. How do we know that? By looking at the Bounce Rate (the amount of users that come to your website and leave right away without visiting other pages of it). These small things can boost up the approach of a company towards its client and make them a returning visitor.

I have practiced GA by connecting this blog to my GA account, and it is very interesting to see and analyze its traffic. The visitors: where are they from? How many and at what times of the day? Their ages and from what devices they are visiting the blog... All the information in one statistical database ready to be used for monetary reasons, or whatever you choose.

After taking the GA test three times (You can take it by creating an account in Google/Partners) and failed (you must get an 80% to be certified), at the fourth try I finally made it with a 91%. So, now I am officially Google Analytics Certified.


It is a sweet prize for so much hours that I put into it, but it is all worth it.

Set a Goal to Your Google Analytics Account.

So, after creating the "Thank You" page for your user's contact info submission, the next step is to connect this achievement to Google Analytics. Why? The purpose of your website is to share with your users any type of information, product, or service that your site promotes, and you want them to be engaged in it. Consequently, if they buy a product, or a service, or register to your database, that is a win for your business. And those specific actions that we want our users to make are called Goals. Let's set it up!

Visit your website and land on the Thank You page. Copy the URL and head to GA. Once, you are in GA, select the account that you use to manage your weebly site. In your left panel, go to "Conversions" and choose Goals, then overview. Click on "Set Up a Goal". Then, click on the red button that says "+ New Goal". You are gonna see something like this.


Give any name in your goal description and choose destination, because we are giving a link. Press "Continue". The second step is to paste the URL of your weebly site Thank You page where it says destination. Click Save.


THERE IT IS! Your first Goal from your weebly site. This will help us see the conversion rates, which are useful to see how engaged are users to your site.

Collecting Data Inside Your Weebly Page.

Back to talking about weebly. This time we are creating a new page inside your site that is gonna serve for collecting data and engaging more people into your site.

First, lets build up your website a little bit more. Stay in the "Build" section and choose "Contact Form" under Elements. Drag it to wherever you want it to be. This is a form of information receptor. Basically, you put both your name and email to be part of the website's database. People usually do this so in the future you can receive emails with notifications of news from the website. 


Once you have done that, Go to the top and select Pages. Create a new page and name it "Thank You". Drag a text box from the Elements to the middle of the page and also write "Thank You". This part is important. Every time a user goes into your website, registers their info and submits it, they will be directed to the "Thank You" page. How? Go back to your home page and click on the button from the contact form that says "Submit". When you click it, a box will appear with everything that the buttom has. Add your email to it, and below it click "confirmation" and then "link". You will see something like this.


Drop down the "Standard Page" and select your "Thank You" page. This means, that every time someone submits their info, you will receive a notification to your regitered email, and they will be directed to the Thank You page.

Intro to HOOTSUITE


After connecting the Weebly website to the Google Analytics account with the purpose to track its movement, now we got to make it move. To be honest, it is a bit annoying to be hopping from social media to social media sharing your website on one at a time. Well, Hootsuite is gonna make it simple for us.

Basically Hootsuite is a free website where you can register and use its tools to publish any type of content in all of your social media pages that you choose, at the same time. When you first register, Hootsuite is gonna guide you through the steps to learn how to use the basic features of it. It will teach you how to connect your Facebook, Twitter, Instagram, LinkedIn, etc., to it. (You can only add two social media pages for free. The third one will request you to get Hootsuite PRO for some $$$). Anyways, once you have added them, it will look something like this..


In there you can see, I have chosen to see my current tweets and my Facebook timeline. If you see closely, you will notice I have shared my blog in my last Hootsuite session. I will show you how to do it.
Go to the top where you'll find a small box on the left corner that says "send to...". By passing your mouse on it, a box will drop with the different social media accounts you have your Hootsuite connected to. 


Select which ones you want to share stuff to. After you have selected them, right next to it is gonna be the message box. Type whatever attractive title will bring attention to your content, and at the bottom, add the link of the website you are sharing... in my case, I shared the link of my last blog post.

Click send, and automatically you will see how your content is being shared on your social media timelines... which you can see in the columns of your Hootsuite main page. Pretty easy to use and it really comes in a handy when working on Digital Marketing. 

How To Connect Your Weebly Site To Your Google Analytics Account.


Last week we talked about this great site where you can create you own websites with unlimited customization help. After creating a few pages and making it look decent for the online world, now it is time to track the movement of it. Here is where Google Analytics comes in a handy.

Just like we did with our blog's promotion week on Facebook- tracking every session, we will do the same for the site. Follow up a few simple steps.

First, go to your GA account to "Admin". There you will see the list of your current websites that you are already tracking. Where it says "Property" drop down that button and create select "Create New Property". You are gonna see something like this.


Second, give a name to your website so you will identify it every time you go into GA. Next, copy your websites link into the "Website URL", which you can find in the section of "Settings" under "General Settings". Click on "Get Tracking ID" on the bottom of the page.

Third, copy the "Website Tracking" script- that will be the one with the "script" at the top, followed by a bunch of random alien numbers and letters. Copy it and go to your Weebly site in the "Setting" section. Click SEO and paste your tracking script into the "Fooster Code" box.

AND THERE IT IS! Share it and give it 24 hours until it starts working.

Thursday, December 3, 2015

What Color Is Your Parachute?: Chapter 8 (Review)


Chapter 8 talks about a big truth for the desperate job-hunters out there, a truth that may give you happiness for your professional life. "You Get To Choose Where You Work" is the title of the 8th chapter, and it gives you simple steps on how to do it. I'm going to explain the first step, which is in my consideration the most important one.

FIRST, YOU NEED TO FIND OUT WHAT CAREERS OR JOBS YOUR (SKILLS) POINTS TO.

1. Choose the top three of your favorite Knowledge or Field of Interest: e.g. Music, Management, and Marketing.

2. Then, choose your top five Transferable Skills, or in other words, remind yourself how skillful you are in your three Field of Interest options.

3. This step is very important for the continuation of the process. Take what you have done so far and show it to at least five friends, family members, or professionals whom you may know. Ask them what jobs or works this page suggests them . Ask them, "What career fields do these suggest to you?" Write down whatever suggestion they make and do the following:

EXAMPLE: Lets use the three Field of Interest options from above, and put those three favorite Knowledges on a series of overlapping circles.


Your mission is to find the center point where you can find a job that has all three your favorite skills included. Next step, recognize which one of the three is the one you have worked the most to and have more experience. Let's choose Marketing. So you go visit a marketing professional that you know (or set appointment with one. Pay them if necessary), and ask them how you can combine those three fields of interest in one.

Lets analyze the three of them so we can come to a conclusion for an imaginary situation. As, a marketing professional, you can create events that involve music, choose to promote musicians for certain label company, take care of the social media for musicians or bands that need promotions,etc. If you wanna include Management, then think about managing a musicians career, or create your own business where you give management assistance to different bands that may want to rise in the music industry.

4. Write down every little thing the marketing professional may tell you. You will need it for your job search.

5. After a week of doing this. Sit down and revise your notes. Find out what you like the most and see if that is a career path you are willing to choose. If it is, in the end it will be worth it.

After reading the other steps, you can strengthen your attitude toward the future you want and it will create expectations and motivate yourself to achieve it. This process is only one step closer to your dream job.